
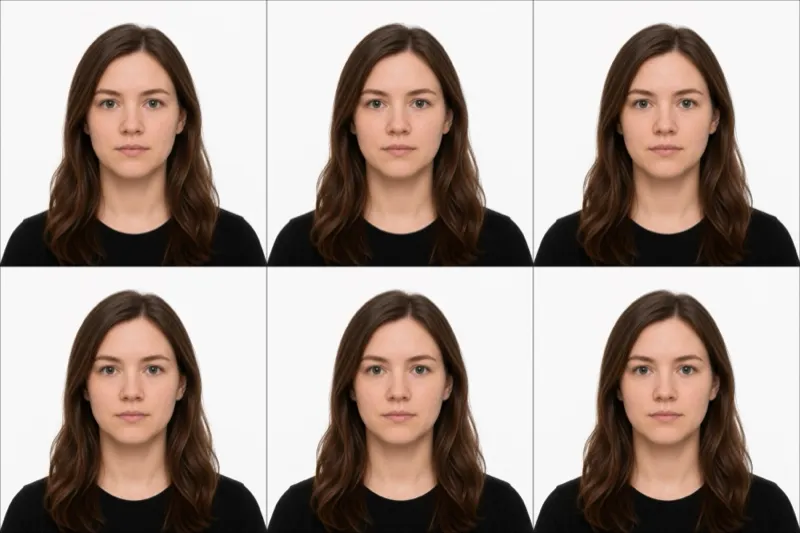
What an FBR photo set actually is
Foreign Birth Registration is how you claim Irish citizenship through an Irish-born grandparent (or a parent who was already a citizen). It is not a passport — it’s the step before you can get one. And the photo requirement catches people who assume “I just need a passport photo.”
You need four identical photos, and two of them must be signed and certified on the back by your witness. The same witness also signs your FBR application form, and the signature on the photos has to match the signature on the form. The Department of Foreign Affairs (DFA) treats the certified photo as proof that the person in the picture is the person making the application — so the witnessing is doing real work, not box-ticking.
Practically, that means the photo is only half the job. A tool, a booth, or a photographer can produce four compliant prints; none of them can certify the two on the back. You take the four prints to your witness yourself, and you bring them all at once so the two certified prints and the form are signed in the same sitting.
Which size to use (you have two)
FBR is more relaxed about size than the Passport Online portal, which is strict about a single 35×45 mm format. For the Foreign Births Register, the DFA accepts two sizes:
- 35×45 mm — the standard Irish/EU passport size. This is the safest default and the one most Irish photo shops will produce without being asked.
- 51×51 mm (US 2×2 inch) — accepted for FBR, which matters if you’re applying from the United States, where every pharmacy and post office shoots the 2×2 square by default and the 35×45 size is hard to get.
Pick whichever your local providers shoot natively. If you’re in Ireland, the UK or the EU, use 35×45. If you’re in the US, 2×2 is fine and saves you hunting for a shop that does the European size. The chin-to-crown head height stays the same (about 32–36 mm) in either frame; only the surrounding border changes. Whichever you choose, all four prints must be the same size — don’t mix a 2×2 with a 35×45 in one set.
The witness step — signatures must match
This is the part of FBR that has no passport-photo equivalent, so it’s worth getting exactly right.
Your witness must be from the DFA’s eligible list. For applicants resident in Ireland that’s a member of An Garda Síochána. For applicants overseas — which is most FBR applicants — it’s a notary public, a solicitor, or a registered doctor. Pick someone who can certify both the form and the photos in one appointment.
What they do:
- Write your FBR application number on the back of two of the four photos.
- Sign and (where they have one) stamp those same two photos.
- Sign the certification section of your application form.
The signature on the photos and the signature on the form must match — a reviewer compares them. The other two photos stay blank and are submitted unsigned. Bring all four prints, the form, and your ID to the witness together so nothing is signed out of step.
Taking a photo that passes
The photo itself follows the ordinary DFA rules, so a phone camera is fine — FBR sets fail on framing and lighting, not megapixels:
- Stand 1.5–2 metres in front of a plain white, light grey or cream wall, with the same distance behind you so you don’t throw a shadow.
- Face a window. Even front light avoids the under-eye and nose shadows that overhead lighting creates.
- Have someone else take it — selfies distort the face and almost always mis-frame the head.
- Neutral expression, mouth closed, both eyes open and fully visible, head straight, facing the camera. Tuck hair clear of your eyes.
- Crop to your chosen frame (35×45 mm or 2×2) with the head filling the right share, then print four identical copies. The photo must have been taken within the last 6 months and be a true likeness of you now.
If you’d rather not eyeball the crop and head height, uploading the shot to a tool that crops to either accepted FBR size and lays out a print sheet removes the guesswork — but remember it produces the prints, not the two certifications, which still happen at the witness.
Why FBR is usually a paper job
Most adult passport applications in Ireland now go through Passport Online, where you upload one digital photo and the portal checks it automatically. FBR works differently, and the witnessed-photo step is the reason.
You complete the FBR application through the online portal, but physical, witnessed photos are part of the supporting documents you send in — there’s no way to certify the back of a photo through an upload. So even though the application starts online, you’re producing real prints and getting two of them signed by hand. Plan for that: budget time for the witness appointment, and don’t book it until you actually have the four prints in your hand.
This is the single biggest expectation gap for FBR applicants coming from the passport world. The passport portal trained everyone to expect a quick digital upload; FBR still runs on paper and a wet signature.
What gets an FBR set returned
The DFA returns FBR applications for the same few photo problems again and again. Each one, and the fix:
- Only some photos witnessed — two of the four prints must be signed and certified on the back, and the signature must match the form. A single missing signature sends the application back.
- Re-certify trap — if your first photos are rejected or you decide to re-shoot, the new set has to be witnessed again from scratch. The old certification doesn’t carry over. People lose weeks here by re-shooting and forgetting the photos now need a fresh signature.
- Mixed or wrong size — use 35×45 mm or 2×2 inch, and make all four the same. A random crop that’s neither size will be returned.
- Shadows — on the face or the wall behind you. Move off the wall and light yourself from the front.
- Smiling or mouth open — neutral expression, mouth closed.
- Photo older than 6 months — it must be a current likeness.
If you do need an actual Irish passport once your citizenship is registered, the photo rules are similar but the submission is different — see the Irish passport photo page for the Passport Online digital-upload spec and the where-to-get comparison.
Ready to skip the studio?
Upload a selfie and get a compliant photo in 2 minutes.
Sources & References
This guide is fact-checked against official government publications and updated regularly to reflect the latest requirements.
- [1] Ireland.ie — Registering a foreign birthireland.ie
- [2] Citizens Information — Becoming an Irish citizen through your ancestrycitizensinformation.ie
- [3] Foreign Births Register applicant portalfbr.dfa.ie