How to Take a Passport Photo at Home with iPhone
Step-by-step guide to taking a compliant US passport photo with your iPhone. Learn the lighting, distance, and background tips that get your photo accepted.
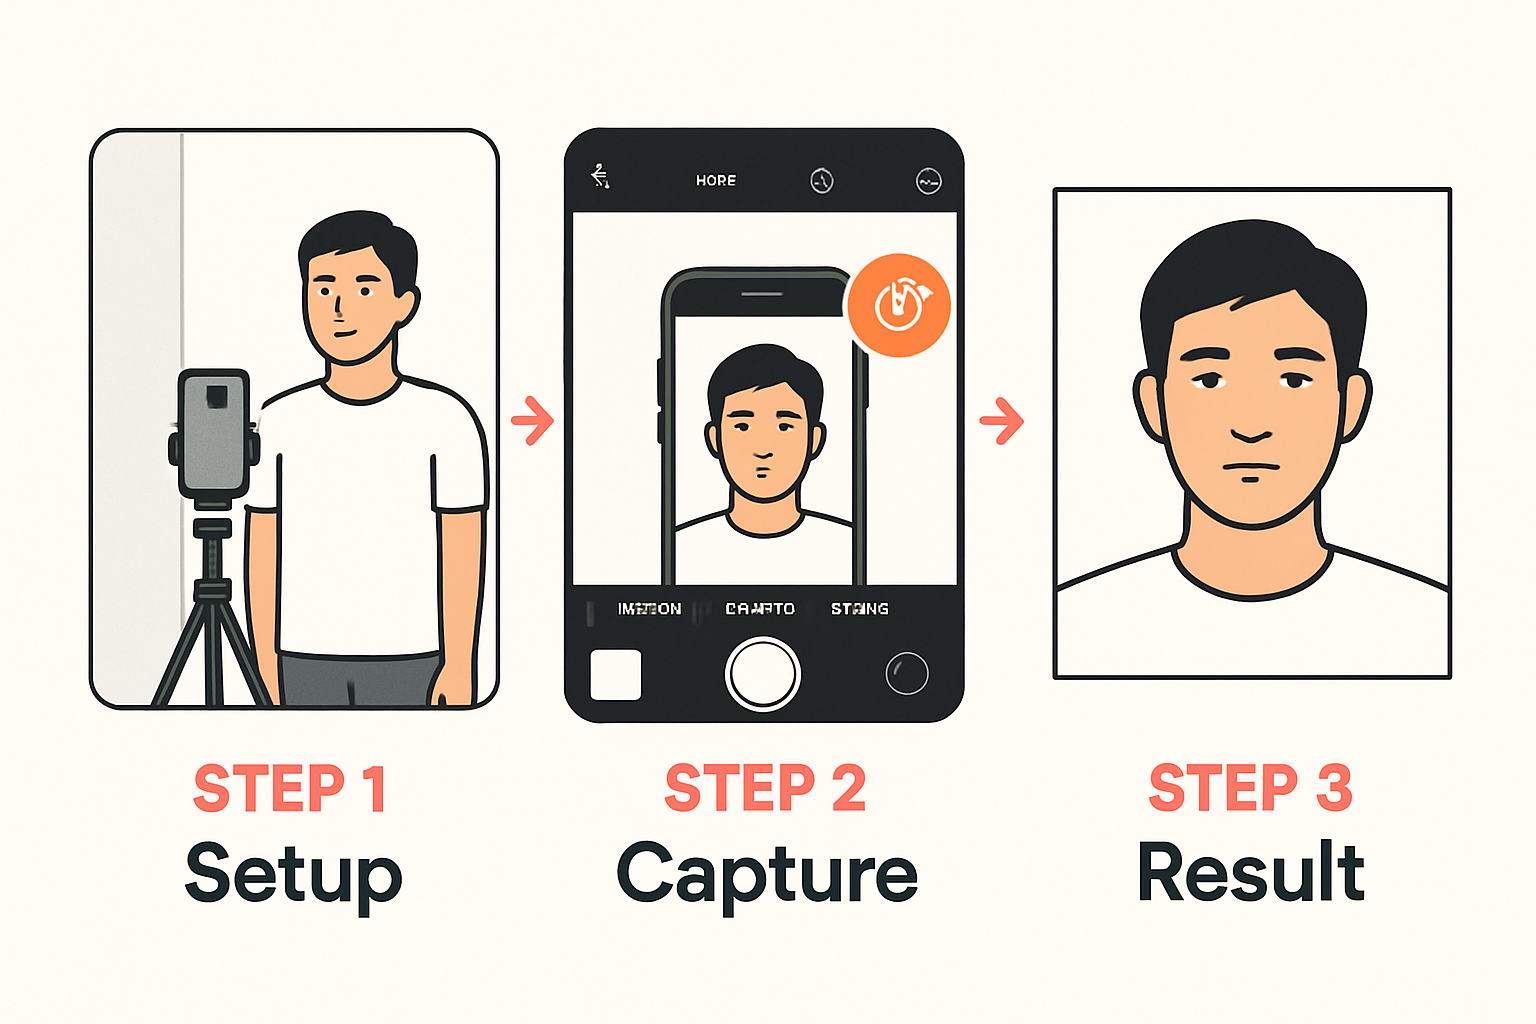
Taking a passport photo at home with your iPhone is easier than you think. With the right technique and our online tool, you can create a compliant photo in minutes—without paying $15+ at CVS or Walgreens.
What You’ll Need
- iPhone (any model with a decent camera)
- A plain white or off-white wall
- Good lighting (natural daylight works best)
- A friend to take the photo (or a tripod/phone stand)
Step 1: Find the Right Background
The US State Department requires a plain white or off-white background. Look for:
- A blank wall without pictures or decorations
- Even coloring with no shadows
- Sufficient space to stand 4-6 feet away
Tip: If you don’t have a plain wall, hang a white bedsheet or use a large piece of white posterboard.
Step 2: Set Up Proper Lighting
Lighting is crucial for an acceptable passport photo:
- Natural light from a window works best
- Face the light source to eliminate shadows on your face
- Avoid overhead lighting that creates shadows under your eyes
- Don’t stand with a window behind you (creates silhouette)
The best time is during the day with overcast skies—soft, even lighting without harsh shadows.
Step 3: Position Yourself Correctly
Follow these positioning guidelines:
- Stand 4-6 feet from the camera
- Keep your head centered in the frame
- Maintain a neutral expression (slight smile is okay)
- Keep your eyes open and looking directly at the camera
- Remove glasses (new requirement as of 2016)
Step 4: Take the Photo
When taking the shot:
- Open the Camera app on your iPhone
- Use the rear camera for better quality
- Enable Portrait mode if available (creates better depth)
- Take several shots to have options
- Review the photos and pick the clearest one
Step 5: Process with 1 Dollar Passport Photo
Once you have your photo:
- Go to 1 Dollar Passport Photo
- Select United States → Passport
- Upload your iPhone photo
- Our AI will automatically:
- Remove and replace the background with white
- Crop to the correct 2×2 inch dimensions
- Validate head size and eye position
- Preview your compliant photo (free!)
- Download for $1 when satisfied
Common Mistakes to Avoid
- Shadows on face or background — Fix your lighting
- Red eye — Don’t use flash, use natural light instead
- Blurry photo — Hold the phone steady or use a tripod
- Wrong expression — Keep neutral, no big smiles
- Hair covering face — Pull hair back from forehead and eyes
Why DIY Instead of CVS/Walgreens?
| Option | Cost | Time | Convenience |
|---|---|---|---|
| CVS/Walgreens | $14.99-16.99 | 1+ hour trip | Must go in person |
| 1 Dollar Passport Photo | $1.00 | 2 minutes | From your couch |
Save 90% and skip the trip. Your photo is processed entirely on your device—we never see or store your image.
Next Steps
Ready to create your passport photo? Start here and upload your iPhone photo. Our AI handles the rest.
Ready to create your passport photo?
Get a compliant photo in 2 minutes for just $1. No signup required.