Toddler & Child Passport Photo: How to Get a Perfect Picture (Ages 1–15)
Complete guide to taking passport photos for children of all ages. Learn official requirements, age-specific tips for infants and toddlers, and how to avoid common rejection mistakes.
Getting a passport photo of a squirming toddler or an uncooperative 5-year-old? Yeah, it’s as challenging as it sounds. But here’s the good news: the State Department actually gives parents some breathing room when it comes to infant and child passport photos. You just need to know the rules—and a few tricks.
Official Child Passport Photo Requirements
Children’s passport photos follow the same basic requirements as adult photos, with a few important exceptions for babies. Here’s what the State Department requires:
| Requirement | Specification |
|---|---|
| Size | 2 x 2 inches (51 x 51 mm) |
| Head size | 1 to 1⅜ inches (25-35 mm) from chin to top of head |
| Background | Plain white or off-white |
| Recency | Taken within the last 6 months |
| Color | Full color photo |
| Paper | Matte or glossy photo quality paper |
| Expression | Neutral, mouth closed, eyes open |
Key differences for infants: Babies’ eyes don’t need to be fully open. The State Department explicitly states: “It is okay if a baby’s eyes are not entirely open.” However, all other children (toddlers and up) must have their eyes open.
Age-Specific Tips: From Newborns to Teens
Newborns (0-6 Months)
This is actually the easiest age group—babies can’t run away or make silly faces on purpose.
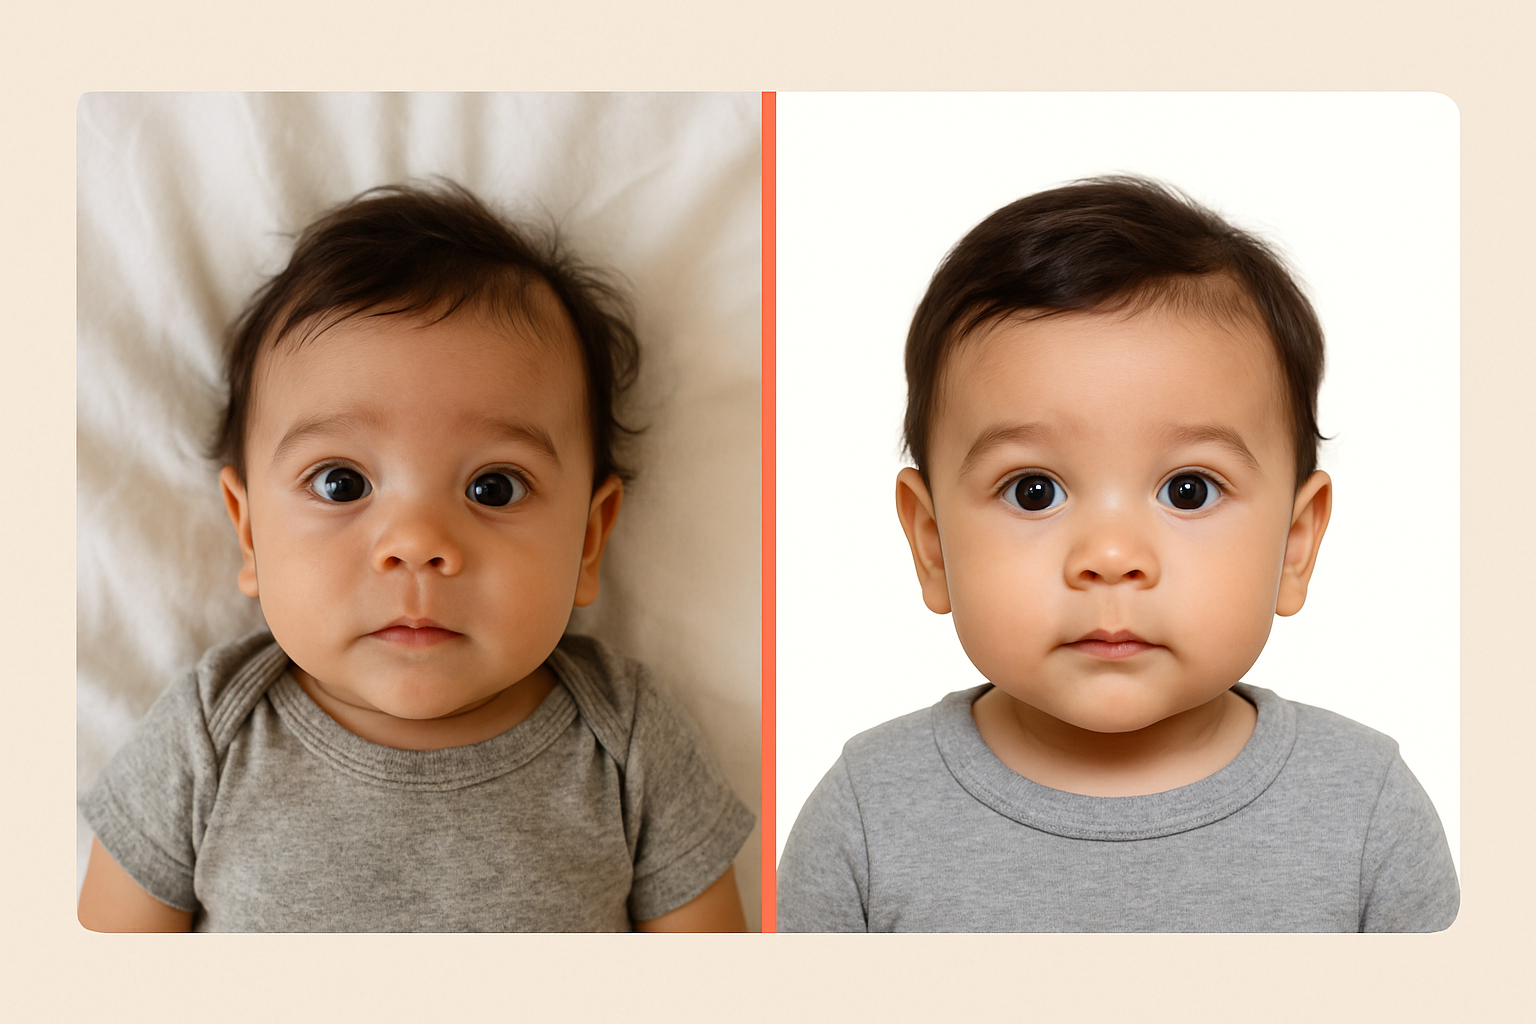
The white sheet method: Lay your baby on a plain white or off-white sheet. Position yourself directly above them with your camera pointing down. This naturally creates the “facing the camera” requirement without needing to prop them up.
Avoid shadows: Make sure no shadows fall on your baby’s face. Natural light from a window works great, but position the baby so the light hits their face evenly.
Timing matters: Take the photo right after a feeding when your baby is calm and alert. A fussy, crying baby won’t give you that neutral expression you need.
Don’t worry about perfect eyes: The State Department allows infant eyes to be partially closed. Get them as open as you can, but don’t stress if they’re a little droopy.
Babies & Crawlers (6-18 Months)
Now it gets trickier. These little ones can move but can’t follow instructions yet.
Car seat trick: Cover a car seat with a plain white or off-white sheet. Strap your baby in (they’re used to it), and you’ve got a contained, supported subject facing forward.
Use a spotter: Have someone stand behind you making attention-grabbing noises or holding a toy just above your camera. You need those eyes looking toward the lens.
Take many shots: Plan on taking 20-30 photos to get one good one. Burst mode is your friend.
Watch the hands: Babies love to put their hands near their faces. Keep toys ready to grab their hands down between shots.
Toddlers (18 Months - 3 Years)
The hardest age group. Mobile, opinionated, and zero interest in sitting still.
Make it fast: You’ve got maybe 30 seconds of cooperation. Have everything set up before you bring your toddler to the photo spot.
Bribery works: Yes, really. Promise a treat after the photo. Show them the treat. Take the photo. Deliver on your promise immediately.
Use the TV: Put on their favorite show for a few minutes, then pause it. Turn them to face you and say “Let’s take a quick picture, then we’ll watch more.” Speed is everything.
Avoid the word “smile”: When toddlers try to smile on command, you get that weird grimace that’s guaranteed rejection. Instead, make them actually laugh right before the shot—then catch the moment their face relaxes.
High chair positioning: A high chair against a white wall (with the tray removed) gives you a contained, seated toddler at the right height.
Preschoolers (3-5 Years)
Starting to get easier. They understand instructions but have limited patience.
Give them control: Let them see themselves on your phone screen. Kids this age love watching themselves, and it keeps them engaged.
Play “statue”: Make it a game. “Let’s play freeze! When I say freeze, make your face very calm and still.” Kids respond to games better than commands.
Demonstrate what you want: Show them a correct passport photo example. Then show them your neutral face. Then ask them to copy you.
Break it up: If they get antsy, take a 2-minute break. Walking away and coming back often resets their cooperation meter.
School-Age Kids (6-12 Years)
The sweet spot. Old enough to understand, young enough to not be self-conscious.
Explain the purpose: “This photo goes in your passport for our trip to [destination].” When kids understand why, they cooperate better.
Let them see the rules: Show them the official requirements. Many kids this age take rules seriously and will try hard to follow them.
Avoid over-smiling: Remind them it’s not like a school picture where they say “cheese!” A relaxed, neutral face is what we need.
Teens (13-15 Years)
Self-consciousness becomes the challenge. Teens often hate photos of themselves.
Take plenty: Let them see and reject photos until they find one acceptable. This prevents the “I hate that photo” meltdown later.
Hair rules: Hair can’t cover the face. Bangs need to be pushed aside or pinned back so both eyes are clearly visible.
No filters: Remind them (seriously) that they can’t use any filters, editing, or AI to modify the photo. The State Department specifically prohibits this.
Natural expression: Some teens try to look “cool” with a serious expression. That’s actually perfect for a passport photo—just make sure both eyes are fully visible.
Common Mistakes That Get Child Photos Rejected
Shadows on the Face
Problem: Overhead lighting or side lighting creates shadows under the eyes, nose, or chin.
Solution: Face a large window with natural light. If using artificial light, position it at eye level in front of your child’s face, not above them.
Wrong Background
Problem: Busy backgrounds, colored walls, or shadows on the wall behind your child.
Solution: A plain white poster board works perfectly. Tape it to a wall and have your child stand about a foot in front of it to avoid casting shadows.
Head Too Big or Too Small
Problem: The State Department is strict about head size—it must be between 1 and 1⅜ inches from chin to top of head in the final 2x2 inch print.
Solution: Use our app to automatically crop and resize. We verify the head size meets requirements before you print.
Eyes Closed or Looking Away
Problem: Child blinked or looked at something other than the camera.
Solution: For toddlers, use attention-getters right above the camera lens. For older kids, count “1, 2, 3” and shoot on 3—they’ll instinctively keep eyes open when expecting a flash.
Mouth Open or Making Faces
Problem: Child was talking, laughing, or making a silly expression.
Solution: For younger kids, catch them right after laughing when their face relaxes. For older kids, have them close their mouth, take a breath, and then shoot.
Hats, Hair Accessories, or Headphones
Problem: Any head covering (except religious attire with proper documentation).
Solution: Remove all hats, headbands, bows that cover the forehead, and hair accessories that cast shadows. Take them off before setting up the shot so you don’t forget.
Someone Else in the Frame
Problem: Parent’s hands, another child’s shoulder, or anyone else visible in the photo.
Solution: If you need to support a baby, use a white sheet or blanket that blends with the background. Hands should never be visible in the final crop.
How to Take the Perfect Child Passport Photo at Home
What You’ll Need
- Smartphone with a good camera (any modern phone works)
- Plain white or off-white background (poster board, sheet, or blank wall)
- Natural light source (large window) or soft artificial lighting
- Someone to help (especially for babies and toddlers)
- A few toys or attention-getters
- Patience (you’ll need it)
Step-by-Step Process
-
Set up the background before bringing your child in. White poster board or a white sheet taped flat to a wall works perfectly.
-
Position the lighting. Natural light from a window is ideal. Have your child face the window so the light hits their face evenly, with no harsh shadows.
-
Get your child in position. For babies, lay them down or use a car seat. For toddlers and up, have them sit or stand about 6-12 inches in front of the background.
-
Get their attention. Have a helper stand directly behind you making sounds or holding a toy. You need eyes looking toward the camera.
-
Take multiple shots. Use burst mode. Take at least 10-20 photos in a row. Kids’ expressions change rapidly—you need options.
-
Check the photos immediately. Zoom in on eyes (open?), mouth (closed?), shadows (none?), and head position (straight?).
-
Upload to One Dollar Passport Photo to verify requirements are met. We’ll automatically crop to the correct size and verify everything before you print.
Why Use an App Instead of a Photo Store?
Taking your child to a Walgreens or CVS for passport photos sounds simple—until you’re there. Here’s the reality:
- Limited retakes. Store employees won’t spend 20 minutes getting your toddler to cooperate.
- No control over timing. Your kid might be melting down right when it’s your turn.
- Pressure. Both you and your child feel the time pressure of other customers waiting.
- Cost. You’ll pay $15-20 per set, and if they get rejected, you pay again.
At home, you control the timing, take unlimited photos, and use our app to verify everything meets requirements—all for just $1. If the first batch doesn’t work out, try again tomorrow. No extra cost, no stress.
FAQ
Can my baby’s eyes be closed in the passport photo?
For infants, the State Department says eyes don’t need to be “entirely open.” Partially open is acceptable. However, for toddlers and all older children, eyes must be fully open.
My toddler won’t stop smiling. Is that okay?
A slight, natural smile is usually fine. What you want to avoid is the wide, “say cheese” smile where the mouth is open. If your child is grinning too big, make them laugh, then capture the relaxed moment right after.
How recent does my child’s passport photo need to be?
The photo must be taken within the last 6 months. Because children’s appearances change quickly, aim to take the photo as close to your application date as possible.
Can my child wear glasses in their passport photo?
No. The State Department requires all applicants, including children, to remove eyeglasses for passport photos. The only exception is a documented medical reason with a signed doctor’s note.
My teenager’s hair covers one eye. Is that a problem?
Yes. Both eyes must be clearly visible. Hair, including bangs, must be pushed aside or pinned back so both eyes are shown completely.
Can I hold my baby in the passport photo?
No. No other person can appear in the frame, including hands. Lay the baby on a white sheet and photograph from above, or use a covered car seat to support them.
What if my child’s photo gets rejected?
Don’t panic. The State Department will notify you and give you a chance to submit a new photo. If you use our app, we verify all requirements before you print, significantly reducing rejection risk.
How long is a child’s passport valid?
Passports for children under 16 are valid for 5 years (compared to 10 years for adults). This means you’ll be taking new passport photos more frequently—another reason to master the at-home technique.
Ready to take your child’s passport photo? Start here—we’ll guide you through the process and make sure the photo meets all requirements before you print. It’s just $1, and it’s way easier than wrestling a toddler at the pharmacy.
Ready to create your passport photo?
Get a compliant photo in 2 minutes for just $1. No signup required.