College ID Photo Guide: What You Need to Know (2026)
Complete guide for incoming freshmen: when to submit your college ID photo, technical requirements, and how to avoid the 1-2 hour campus card office line on move-in day.
Quick Answer (TL;DR)
When should I submit my college ID photo? 6-8 weeks before move-in day (school opens enrollment portal). Submit online → your ID card is printed and ready for pickup during orientation → skip the 1-2 hour campus card office line.
Photo requirements: 2 × 2 inches (51×51mm), plain white background, neutral expression, JPEG format (600+ DPI).
Cost: $15-25 at campus card office, $2.34 at home with OneDollarPassportPhoto.com ($1.35 digital + $0.99 print).
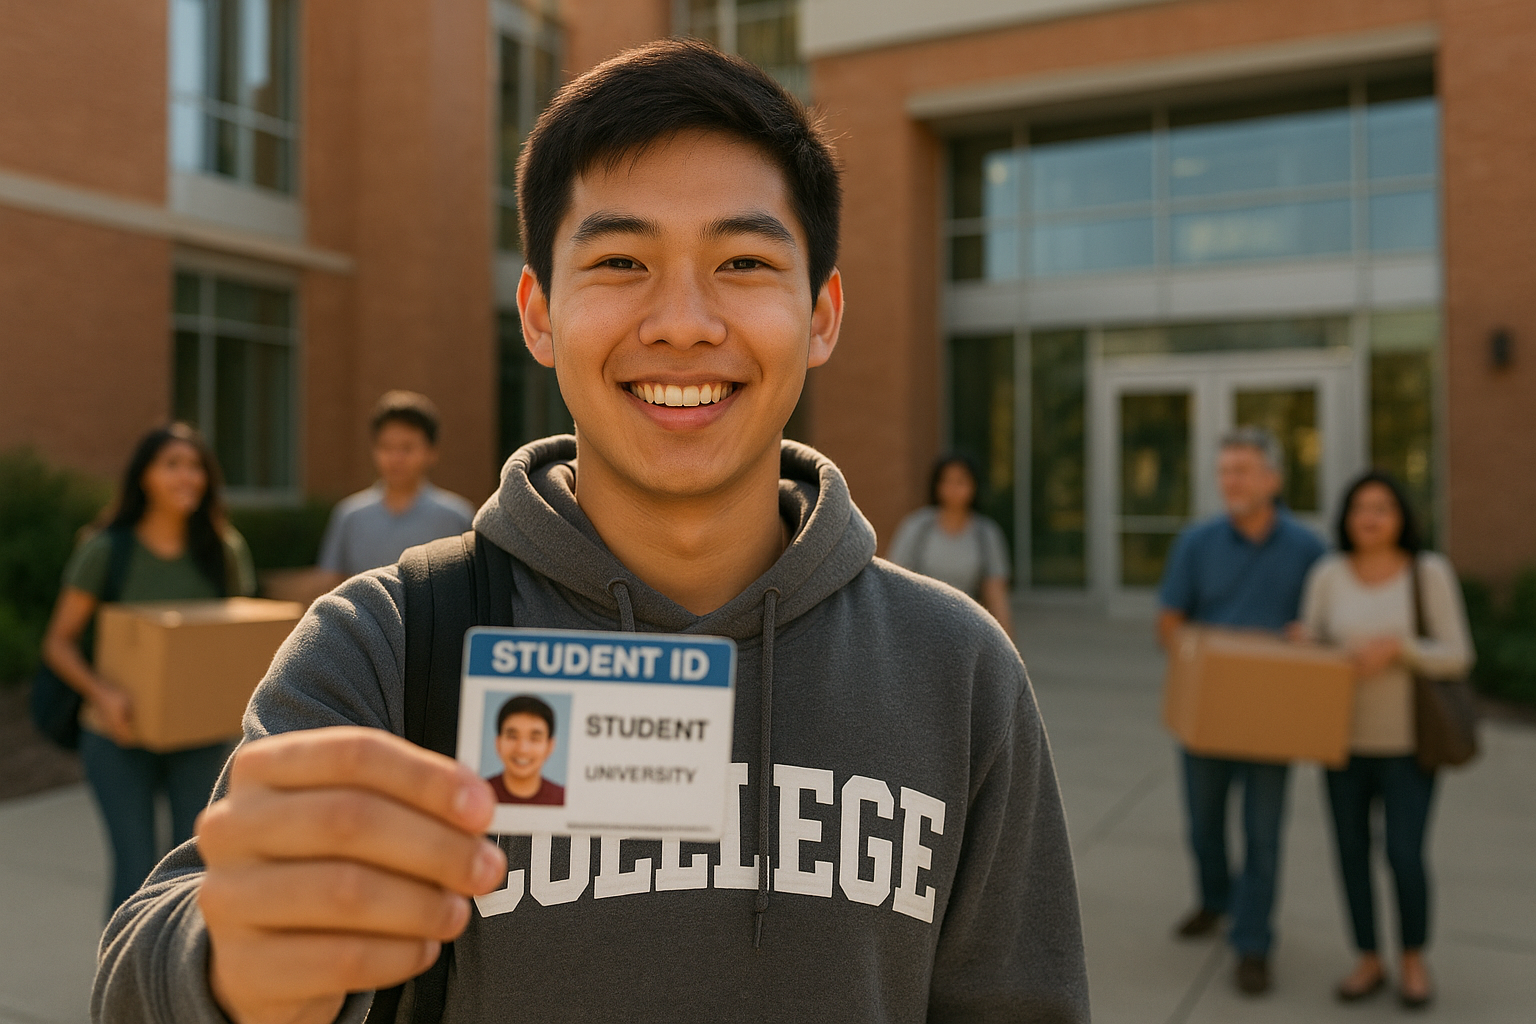
Why it matters: Your college ID card is your key to residence halls, dining plans, library, gym, campus events, and student discounts. You’ll swipe it 5-15 times per day for 4 years (7,000-22,000 total uses). A good photo is professional, clear, and recognizable — not something you’ll cringe at by sophomore year.
What Your College ID Card Is Used For
Your campus card is a multi-purpose access and payment card:
Access & Security:
- Residence hall entry (building + room door)
- Library (checkout books, reserve study rooms)
- Gym and recreation facilities
- Campus events (concerts, sports, lectures)
- Exam identification (finals week)
Financial:
- Meal plan (swipe at dining halls)
- Campus cash (printing, laundry, vending machines)
- Off-campus discounts (restaurants, movies, public transit)
Average daily uses: 5-15 swipes per day (dining 2-3×, residence hall 3-5×, library/gym 1-5×).
Over 4 years: 7,000-22,000 swipes. Your photo will be seen by security guards, dining staff, librarians, and RAs thousands of times.
 Image: Typical college ID card layout — photo, name, student ID number, barcode, magnetic stripe
College ID Photo Requirements (Technical Specs)
Standard US College Requirements
| Requirement | Standard | Why |
|---|---|---|
| Size | 2 × 2 inches (51 × 51mm) | Same as US passport photos |
| Background | Plain white or light grey | Busy backgrounds rejected |
| Expression | Neutral or slight smile | Must look natural |
| Glasses | Allowed (no glare) | Glare = rejection |
| Headwear | Not allowed (except religious) | Face must be visible |
| Photo Age | Within 3-6 months | Must match current appearance |
| Digital Format | JPEG (600+ DPI) | PNG works but JPEG preferred |
| File Size | 100KB-5MB | Too small = pixelated, too large = upload fails |
Examples:
- Harvard, Stanford, MIT: 2×2 inch, white background
- UC Berkeley, UCLA: 2×2 inch, passport-style
- University of Michigan: 2×2 inch, light background
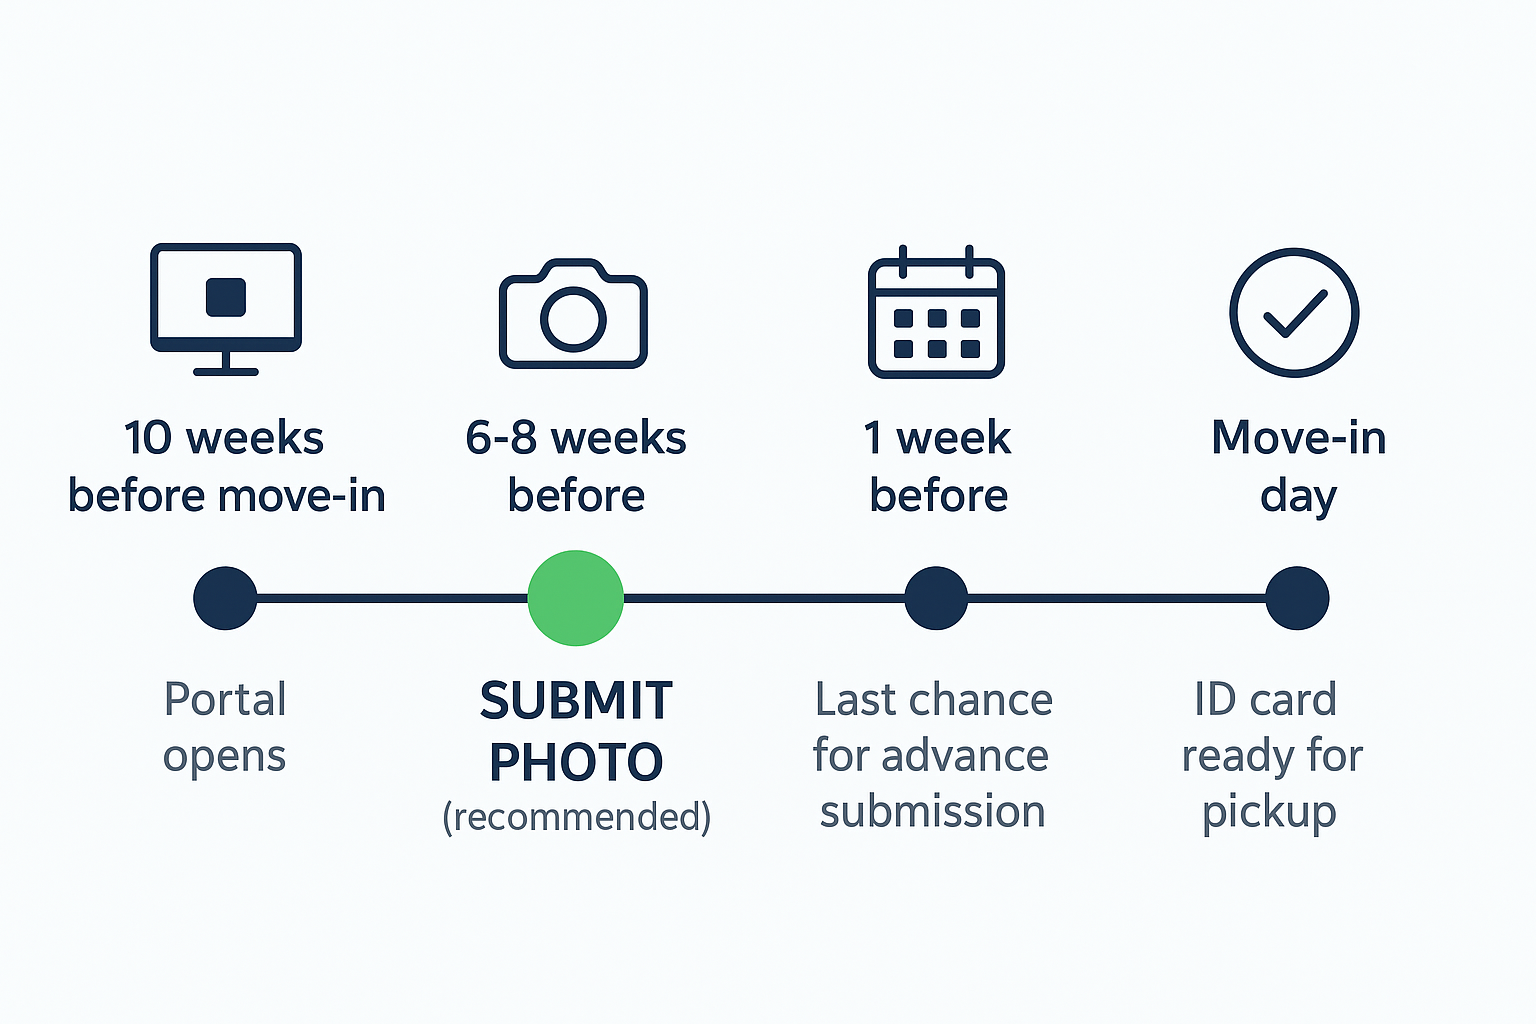 Image: College ID photo timeline — Enrollment opens (10 weeks out) → Submit photo (6-8 weeks out) → ID ready (Move-in day)
When to Take Your College ID Photo
Incoming Freshmen Timeline
6-8 Weeks Before Move-In (Recommended):
- Why early: School’s student portal opens for photo uploads
- Advantage: ID card ready on Day 1 → skip 1-2 hour campus card office line
- Process: Check enrollment emails → upload photo → wait 2-5 days for approval
1-2 Weeks Before:
- Still time to submit online (but ID may not be ready on Day 1)
Orientation Week (On-Campus):
- If you missed deadline: Campus card offices offer walk-in photos ($15-25)
- Wait time: 30 min-2 hours (peak: first 2 days of orientation)
- Pro tip: Go early morning (8-9am) or late afternoon (4-5pm) to avoid lines
Best strategy: Submit photo 6-8 weeks before move-in → avoid orientation week chaos.
Continuing Students (Sophomore/Junior/Senior)
Do I need a new photo each year?
- Most schools: NO — freshman photo used for all 4 years (unless you request update)
When to update:
- Sophomore year: If freshman photo was awkward (bad lighting, weird expression)
- Junior year: If appearance changed (new hairstyle, glasses, weight change)
- Senior year: For alumni card (some schools integrate senior photo)
How to update:
- Visit campus card office
- Bring new photo (2×2 inch print OR digital file)
- Pay update fee: $5-15
- New ID printed in 5-15 minutes
How to Take Your College ID Photo at Home
Total time: 15-20 minutes
Total cost: $2.34 (vs $15-25 campus)
5-Step Process
1. Set Up Your Shot
- Stand 3-4 feet in front of plain white wall
- Face window (natural light, no direct sunlight)
- Camera at eye level, 3-5 feet away
- Turn OFF portrait mode
2. Choose Your Outfit
- ✅ Plain solid-color t-shirt, sweater, or button-down
- ❌ Graphic tees, tank tops, busy patterns
3. Pose Correctly
- Face camera directly
- Neutral expression, mouth closed
- Eyes open, looking at lens
- Shoulders visible
4. Take Multiple Photos
- Take 5-10 photos (gives options)
- Review for: sharp focus, no shadows, neutral expression
5. Process with OneDollarPassportPhoto.com
- Upload your best photo
- Select “US Student ID (2×2 inch)”
- AI crops to exact size, removes background imperfections
- Download digital file (JPEG, 600 DPI, $1.35)
- Print at CVS/Walgreens ($0.99)
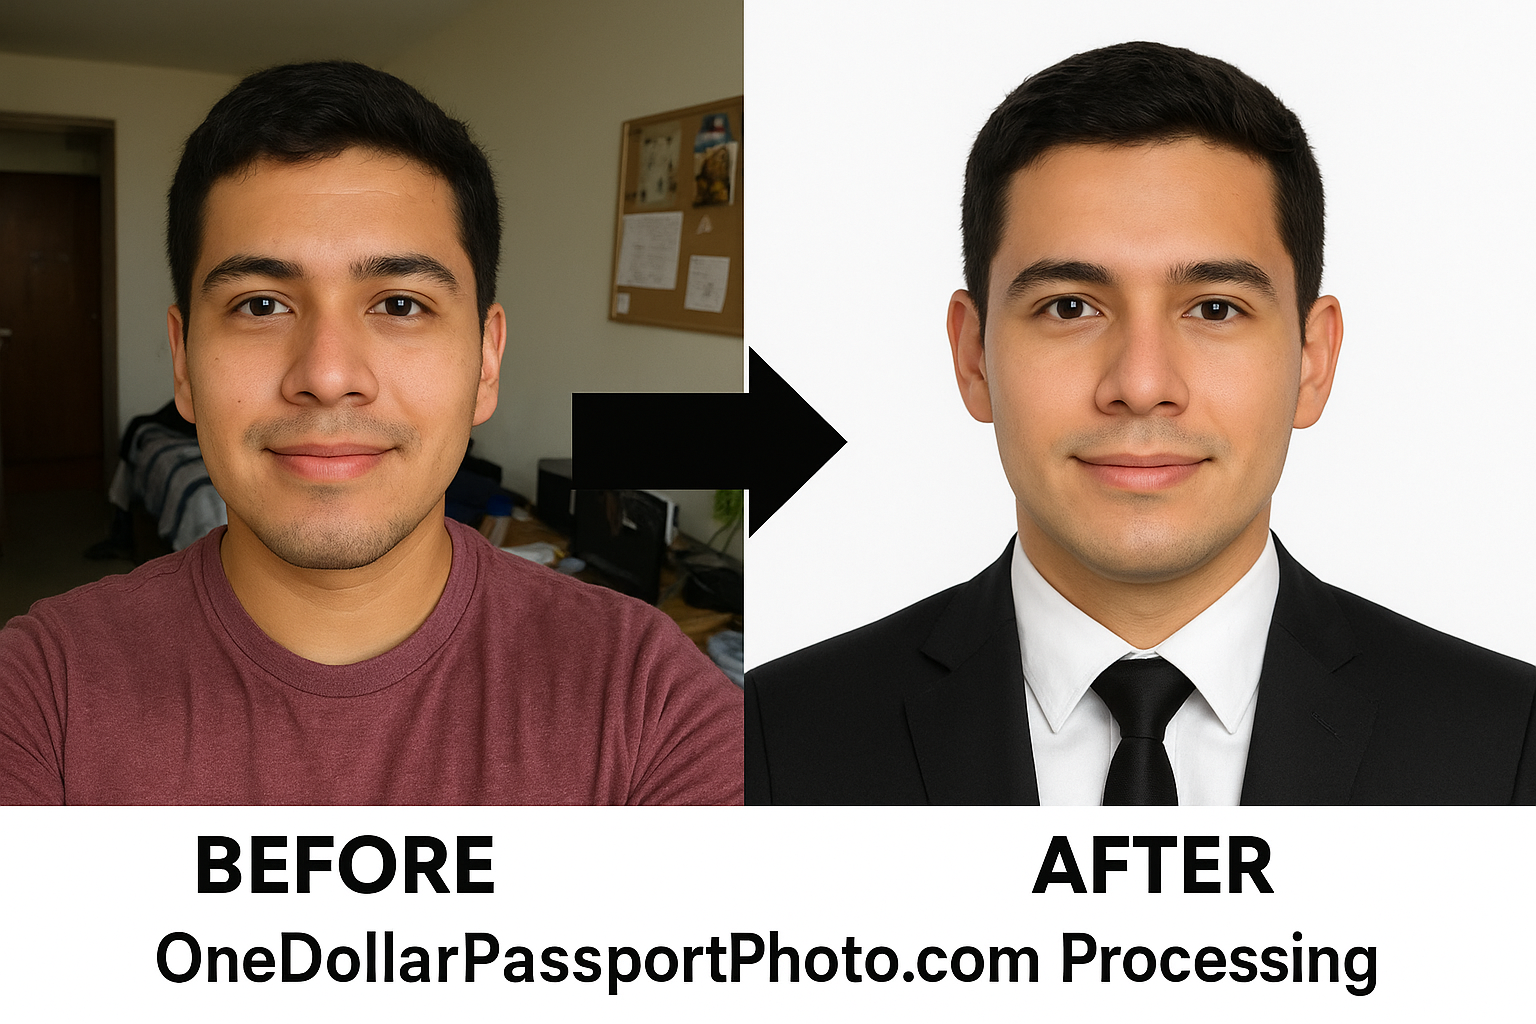 Image: Before (DIY photo with messy background) → After (OneDollarPassportPhoto.com processing) → Embassy-ready result
Digital Submission vs Physical Photo
Digital Upload (Recommended)
Process:
- School sends enrollment link (email/portal)
- Upload JPEG file (600 DPI, 2×2 inch)
- Wait 2-5 days for approval
- Pick up ID card during orientation
Pros:
- ✅ Upload from home (no campus visit)
- ✅ Cheaper ($2.34 vs $15-25)
- ✅ ID ready on Day 1
Cons:
- ❌ 20-30% rejection rate (wrong specs)
Physical Photo Submission
Process:
- Bring 2 printed photos to campus card office
- ID printed immediately (5-10 min)
Pros:
- ✅ Instant ID card
Cons:
- ❌ Must visit campus
- ❌ Expensive ($15-25)
- ❌ Long lines during orientation
Where to Get College ID Photos (Cost Comparison)
| Location | Cost | Time | Best For |
|---|---|---|---|
| Campus card office | $15-25 | 10-20 min | Guaranteed acceptance, but expensive |
| Walgreens/CVS | $16.99-19.99 | 10-15 min | Professional equipment |
| Walmart | $7.44 | 10-15 min | Cheaper retail option |
| DIY + OneDollarPassportPhoto.com | $2.34 | 15-20 min | 85-95% cheaper, guaranteed compliance |
Cost breakdown (DIY):
- OneDollarPassportPhoto.com: $1.35
- 4×6 print at CVS: $0.99
- Total: $2.34
- Savings vs campus: $12.66-22.66 (85-95%)
Freshman vs Senior Year Photos
Freshman Photo (Most Important)
Why it matters:
- 4-year commitment (unless you update)
- First impression during orientation
- Most-used card (learning campus, swiping everywhere)
Tips:
- Take it seriously (not last-minute selfie)
- Look like yourself (security needs to recognize you)
- Neutral expression (ages better than forced smile)
- Recent photo (within 3 months)
Common mistakes:
- ❌ Using high school senior portrait (outdated, wrong format)
- ❌ Taking photo in dorm on move-in day (rushed, bad lighting)
- ❌ Extreme hairstyle/makeup (you’ll cringe by junior year)
Senior Year Update
When to update:
- Fall semester senior year (Sept-Nov)
- After appearance changed significantly
- For alumni card integration
Cost: $5-15 update fee + photo ($2.34 with OneDollarPassportPhoto.com)
Common Mistakes to Avoid
1. Wrong size (30% of rejections)
- Mistake: Uploading Instagram photo instead of 2×2 inch format
- Solution: Use OneDollarPassportPhoto.com to guarantee exact specs
2. Busy background (25%)
- Mistake: Selfie in dorm (posters, furniture visible)
- Solution: Plain white wall
3. Poor lighting (20%)
- Mistake: Flash or dim room (shadows on face)
- Solution: Natural window light
4. Wrong file format (15%)
- Mistake: HEIC (iPhone default) instead of JPEG
- Solution: Convert to JPEG OR use OneDollarPassportPhoto.com (outputs JPEG)
5. Low resolution (10%)
- Mistake: Manually cropping/resizing, reducing DPI
- Solution: OneDollarPassportPhoto.com outputs 600 DPI
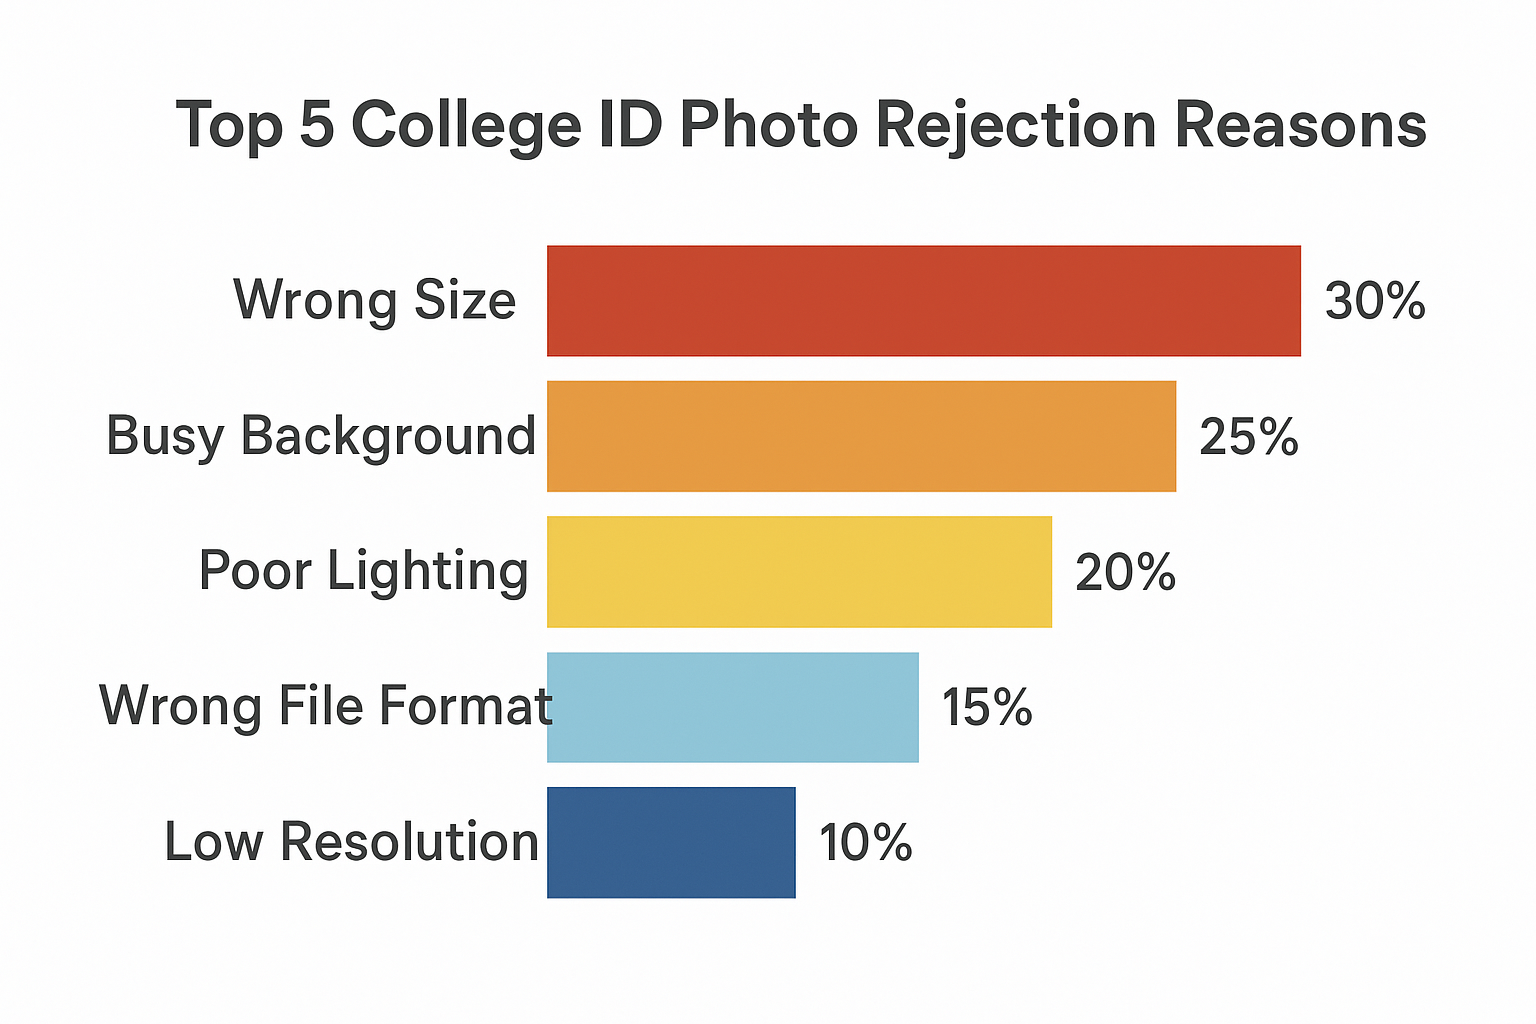 Image: College ID photo rejection reasons — Wrong size 30%, Busy background 25%, Poor lighting 20%, Wrong format 15%, Low resolution 10%
FAQ
Q: Can I smile in my college ID photo?
A: Most US colleges accept slight smile (mouth closed). Teeth-showing smile usually not accepted. Neutral is safest.
Q: Can I wear glasses?
A: Yes at US colleges (no glare required). Not allowed at UK/Australian universities.
Q: Can I use my passport photo?
A: Yes, if 2×2 inch (US passport size = US student ID size). UK/EU passport photos (35×45mm) wrong size.
Q: Can I update my photo after freshman year?
A: Yes. $5-15 update fee. Visit campus card office with new photo.
Q: What if my photo is rejected?
A: Review rejection reason, retake photo, resubmit. Most schools allow unlimited resubmissions.
Q: Can I wear hijab/turban?
A: Yes. Face must be fully visible (hairline to chin).
Q: Do I get physical ID or digital?
A: Both. Physical card for swipe access + mobile app for contactless entry (at some schools).
Checklist: College ID Photo Submission
6-8 Weeks Before School:
- Check school’s photo requirements (enrollment portal)
- Note size (2×2 inch), background (white), format (JPEG)
2-3 Weeks Before:
- Take photo at home (smartphone, white wall, window light)
- Process with OneDollarPassportPhoto.com ($1.35)
- Download digital file
1 Week Before:
- Upload photo to student portal
- OR print at CVS ($0.99) for physical submission
Move-In Day:
- Pick up ID card at campus card office
- Activate card (meal plan, residence hall access)
Total Cost: $1.35 + $0.99 = $2.34 (vs $15-25 campus)
Create Your College ID Photo Now: Upload to OneDollarPassportPhoto.com, select “US Student ID,” get print-ready file in 2 minutes. $1.35 digital download. 200% money-back guarantee.
Ready to create your passport photo?
Get a compliant photo in 2 minutes for just $1. No signup required.